

Before you begin
To invite users, you need:- Admin access to your 1eyeᴬᴵ workspace
- The teammate’s work email
- The role you want to assign
- Optional details like title, phone number, and middle name
Where to find Users
Step 1: Login to workspace
- Open your 1eyeᴬᴵ workspace
- Select User
Step 2: Invite a teammate
- Select Invite User
- Enter their email address
- Choose a role
- Select Send Invite
What you can see on the Users page
The Users page gives you a quick view of your team. You can see: User name, Email, Status, Role, Sign-in method. You can also search, filter, and review users by status.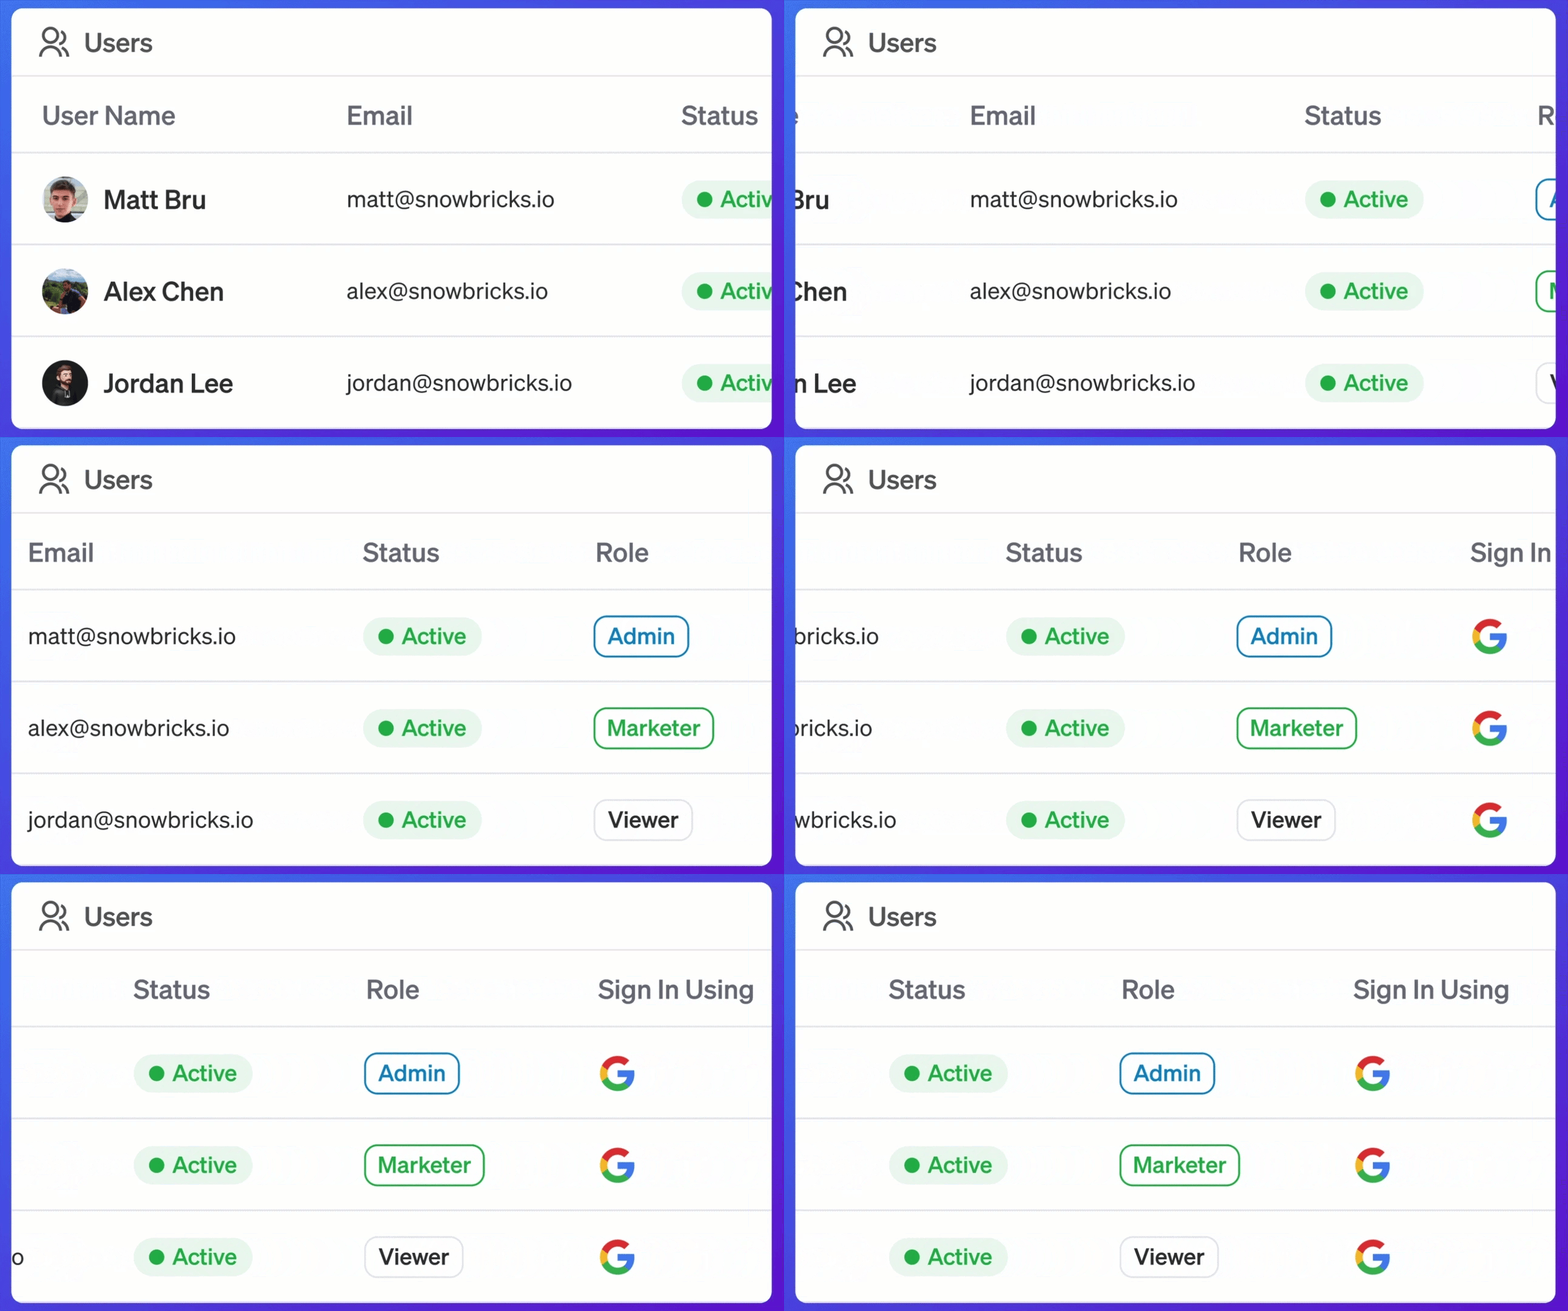
User statuses
Use status filters to review active, pending, and suspended users. You can resend a pending invite or revoke it before it’s accepted.
User roles
1eyeᴬᴵ supports three workspace roles: Admin, Marketer, Viewer.
Choose the role that matches how much control each teammate needs. You can change a teammate’s role at any time.
Role summary
Invite Users
Each user has a workspace role, status, sign-in method, and connected apps. Roles control what each teammate can access and what actions they can take inside 1eyeᴬᴵ. Once your workspace is set up, invite your teammates so they can work from the same signals and target lists.Before you begin
To invite users, you need:- Admin access to your 1eyeᴬᴵ workspace
- The email addresses of the teammates you want to invite
- A decision on what role each teammate should have
Step 1: Open the Users page
From your workspace, select the Users icon in the top-right navigation. This opens the Users page. Here you can review: All users, Active users, Pending users, Suspended users, User roles, Connected apps.Step 2: Select Invite User

Step 3: Add user details
Enter the teammate’s details. For example, if Snowbricks wants to invite a GTM user:
Use the teammate’s real work email so they can accept the invite and access the workspace.
Step 4: Choose a role
Select the right role for the user.- Use Admin if the teammate should manage workspace setup, users, billing, settings, integrations, and account-level controls.
- Use Marketer if the teammate should run GTM execution, including signals, target lists, destinations, and exports.
- Use Viewer if the teammate only needs to view and export workspace data.
Step 5: Send the invite
After filling out the form, select Invite User. 1eyeᴬᴵ sends an invitation to the user’s email. After the invite is sent, the user may appear as Pending until they accept the invitation and sign in.Step 6: User accepts the invite
The invited user should open the invitation email and sign in. Once the user signs in, their status should update to Active. If the user does not see the invite, ask them to check their spam folder or confirm that the email address was entered correctly.Step 7: Review the user profile
After a user is active, you can open their profile to review their settings. General tab — The General tab shows the user’s basic profile and workspace access. You can review: First name, Last name, Title, Phone number, Email, Role, User type, Last login date, Created date, Updated date. For Snowbricks, an example user profile could look like:Display timezone
Each teammate has their own display timezone — a personal setting that controls how 1eyeᴬᴵ formats timestamps for them across signals, target list and destinations. It’s tied to the individual’s account, not the workspace, so each teammate can see times in their own timezone. Where to find it — Select your profile picture in the top-right navigation. Your current display timezone is shown at the top of the menu, alongside Edit profile and Logout. How to change it- Select your profile picture in the top-right navigation.
- Select the row showing your current timezone — for example, America/Los Angeles (GMT -07:00).
- Use the search box to filter the list of timezones, shown as region, city, and GMT offset.
- Select the timezone you want. A checkmark shows your current selection.
Example Snowbricks user setup
A small team can start with one Admin and one Marketer. A larger GTM team may add multiple Marketers for sales, marketing, RevOps, and outbound execution, plus Viewers for leadership or read-only stakeholders.
Best practices
- Invite the core team first — Start with the teammates who need to review signals, build lists, or manage destinations.
- Use Admin carefully — Admins can manage important workspace and account-level settings. Give Admin access only to teammates who need it.
- Use Marketer for GTM execution — Marketers are best for teammates who create target lists and configure destination workflows.
- Use Viewer for read-only access — Viewers are best for executives, advisors, investors, or teammates who need visibility but should not change anything.
- Review pending users — If a teammate has not accepted their invite, they may still appear as Pending. Follow up before launching workflows that depend on their account.
- Keep user profiles current — Update titles, roles, schedules, and connected apps as teammate responsibilities change.
- Keep at least two Admins when possible — This helps avoid losing access to workspace-level controls if one Admin is unavailable.
- Suspend users who no longer need access — If a teammate leaves the GTM motion or no longer needs access, suspend their access based on your workspace policy.
Troubleshooting
- User did not receive the invite — Ask the user to check inbox, spam folder, promotions/updates folder, and whether the invite was sent to the correct email address. If needed, resend the invite.
- User is stuck in Pending — The user may not have accepted the invite yet. Ask them to open the invitation email and sign in with their work account.
- User cannot sign in — Check they are using the right email, a supported sign-in method, that their invitation was sent to the same email they are using to sign in, and their workspace access has not been suspended.
- User cannot access a feature — Check their role. Some actions require the right workspace role. For example, a Viewer can view and export workspace data, but cannot create, edit, launch, send, or delete anything.
- User cannot invite another user — Only Admins can invite users. If a Marketer or Viewer needs to invite someone, they should ask a workspace Admin.
- User cannot manage billing or plan settings — Billing and plan management are available to Admins.
- User appears inactive — Check whether the user has signed in and whether their status is Active. If they are Suspended, restore access only if they should still be part of the workspace.
- Viewer cannot edit or launch anything — This is expected. Viewers can view and export data, but they cannot create, edit, delete, launch, send, connect channels, or configure workspace activity.
- Times look off across the app for a user — Confirm their display timezone (profile menu) matches their actual location. This is separate from the Schedule tab timezone.
- Display timezone change isn’t reflected — Refresh the page after saving.
FAQ
Who should I invite first?
Who should I invite first?
Invite the workspace Admin first, then add the GTM teammates who will review signals, build target lists, or manage destinations.
What role should most GTM users have?
What role should most GTM users have?
Most day-to-day GTM users should be Marketers.
When should someone be an Admin?
When should someone be an Admin?
Use Admin for teammates who need to manage workspace settings, users, billing, plans, or integrations.
When should someone be a Viewer?
When should someone be a Viewer?
Use Viewer for people who need visibility into workspace data but should not change anything.
Can I change a user's role later?
Can I change a user's role later?
Yes. Admins can update user roles as responsibilities change.
Can I suspend a user?
Can I suspend a user?
Yes. Suspend users who no longer need access to the workspace.
Can a workspace have multiple Admins?
Can a workspace have multiple Admins?
Yes. A workspace can have more than one Admin.
Does my display timezone affect other users in my workspace?
Does my display timezone affect other users in my workspace?
No. Display timezone is a personal setting — it only changes how times appear to you.
Where do I find my current display timezone?
Where do I find my current display timezone?
Select your profile picture in the top-right navigation. Your current timezone is shown at the top of the menu.